Contents
Introduction
The CSV Import feature of Grid Manager provides one way to perform “bulk” updates which create, modify, or delete many DNS and/or DHCP objects at once. Not every imaginable use case is supported, but most common tasks are fairly straightforward.
Caution: it is not possible to “undo” or roll back a CSV import after it is executed!
When in doubt, we highly recommend using development IPAM for proof-of-concept testing.
Note that you can also perform “bulk” updates programmatically using the IPAM API; the advantages and disadvantages of each approach vary depending on the nature of the task at hand.
Creating CSV Data Files for Import
For your convenience, Technology Services has created ready-made template data files for a number of common tasks, which can be used for their intended purpose just by reading and following the instructions on this page.
If you wish to adapt any of the templates for other purposes, or to create your own data files from scratch, please refer to CSV Import Reference in the vendor documentation.
Performing a CSV Import
Once you have created a CSV data file, use the following steps to import your data file into Grid Manager:
- Click “CSV Import” on the Toolbar panel to bring up the CSV Import Wizard.
- Choose the desired import type:
-
Add
Adds a new Grid Manager object based on the data in each row (will fail if an object with the same required field values already exists). - Override
Uses the required field values in each row to select an existing Grid Manager object (will fail if no suitable object exists), then overwrites any other attributes of that object specified in the remaining columns. - Merge
Uses the required field values in each row to select an existing Grid Manager object (will fail if no suitable object exists), then fills in any attributes specified in the remaining columns for which the object does not already have a value. - Delete
Uses the required field values in each row to identify and delete an existing Grid Manager object. - Custom
See vendor documentation. - Replace
See vendor documentation; use with caution.
-
- Click “Next”.
- Click the “Choose…” button and choose a CSV file to upload. The file name should appear in the text box.
-
Optionally select how Grid Manager should behave “On error”.
Note: no matter which behavior you select, any rows before the first error row will always take effect. - Click “Next”.
- The first few rows of your data file should appear in the preview area (separated into columns); make sure it looks reasonable.
-
Click “Import” to begin the operation.
Note: if you click “Save & Close” at any point prior to clicking “Import” in this step, your job will be saved but not executed. See Managing Existing CSV Jobs (below) to find it again.
- The “CSV Import Progress” window will appear, showing the current status of your job (probably “Import pending”).
- You may wait here for your job to complete; when it does (typically within about 30 seconds), the current status will change to “Import successful” or “Import unsuccessful”.
Alternatively, you may click “Close & Run in Background” to dismiss the dialog box and work on something else while you wait; see Managing Existing CSV Jobs (below) to find it again. - Once the job has completed, check the “Rows with errors” counter to see if any errors were generated.
- If so, click the “Download Errors” button to retrieve another CSV file containing the error rows (prepended with their corresponding error messages).
- Remember: any rows from your original CSV file that did not produce errors will still have been imported!
- Click “Close” to dismiss the dialog.
Managing Existing CSV Jobs
Click “CSV Job Manager” on the Toolbar panel to display a table containing your CSV jobs submitted within the last 30 days.
Use the hamburger menu icon in each table row and click “Edit” to open the Edit CSV Import Job dialog box, which includes an “Import” button to execute the job.
Grid Manager allows you to Edit a job which has already been executed and click Import to execute that same job again without re-uploading the file, but if you do so, the information about the previous run (timestamps, error file, etc) will no longer be available in CSV Job Manager. It is usually preferable to start a new import job instead.
You can also use the hamburger menu to Delete a job which has not yet been executed, or Download the Error File from a job which terminated unsuccessfully.
Templates
The following templates are available to help you perform common tasks via CSV Import.
Each template contains at least one header row which can be used exactly as provided, followed by one or more sample object rows which should be modified (and more rows added if necessary) to reflect the actual data you wish to import. The header row beginning with e.g. “HEADER-Foobar” tells Grid Manager how to interpret the columns of the corresponding object rows beginning with e.g. “Foobar” (which must be a valid object type).
Some templates include columns whose values are described as optional; you may safely choose to leave these columns blank when filling in your object rows.
- Create new DNS-only Host Records
Type: Add
Importing this spreadsheet will create a new Host Record for the FQDN in each row, with the specified IPv4 and/or IPv6 address(es) and Host Aliases. You must specify at least one address. The “aliases”, “EA-Property Tag” (Property Tag extensible attribute) and “comment” values are optional. Host records created using this template will not be enabled for DHCP. - Create new DHCP-enabled Host Records
Type: Add
This template expands on the previous one to create new Host Records whose IP addresses are also enabled for DHCP. Each new Host record to be created needs multiple CSV rows:- one “HostRecord” row specifying the FQDN and all of its associated IPv4 and/or IPv6 addresses (as well as optional “aliases”, “EA-Property Tag”, and “comment” values)
- zero or more “HostAddress” rows to enable the DHCP checkbox and specify the associated MAC address for each individual IPv4 address within the Host
- zero or more “IPv6HostAddress” rows to enable the DHCP checkbox and specify the associated DUID for each individual IPv6 address within the Host
- Enable DHCP for Existing Host Addresses
Type: Override
For each row, “parent” and “address” must match the FQDN and an IPv4 or IPv6 address of an existing Host record in IPAM. Importing this spreadsheet will enable the DHCP checkbox for that IP address and overwrite its associated MAC address or DUID (as described in Adding DHCP to a Host record).
Hint: you can obtain names and IP addresses of existing Host records on a network (to use as a starting point) by opening the Network in IPAM view and exporting visible data. - Add IP Addresses to Existing Host Records
Type: Add
For each row, “parent” must match the FQDN of an existing Host record in IPAM. Importing this spreadsheet will assign an additional IP address to that Host record. Optionally, you may choose to enable DHCP for newly added IP addresses. -
Create Stand-alone DNS Records
Type: Add
Use this template to create new Stand-alone DNS Records of various types. Each type has its own header row; please omit any unused header rows from your data file. All “comment” values are optional.Keep in mind that Host Records are often (but not always) preferable to stand-alone A and AAAA records.
-
Create DHCP Fixed Addresses
Type: AddImporting this spreadsheet will create a new DHCP Fixed Address with the IP address and MAC address or DUID specified in each row. The “EA-Property Tag” (Property Tag extensible attribute) and “comment” values are optional.
- Add MAC Addresses to a MAC Address Filter
Type: Add
Importing this spreadsheet will add the MAC address in each row to the MAC Address Filter whose name appears in “parent”. The “registered_user”, “EA-Property Tag” (Property Tag extensible attribute), and “comment” values are optional. - Modify Existing Stand-alone DNS Records
Type: Override
For each row, the required fields (indicated with asterisks) must match an existing Stand-alone DNS Record in IPAM. Importing this spreadsheet will modify that record according to the values specified in the remaining columns. To modify a required field such as the address of an A record, specify the old value in “address” and the new value in “_new_address” (leave “_new_address” blank if you don’t want to change the address). Each type has its own header row; please omit any unused header rows from your data file.
Exporting data from Grid Manager
Many tables in Grid Manager can be exported as a downloadable CSV in two different ways, using the drop-down menu for the Export (up arrow) button:
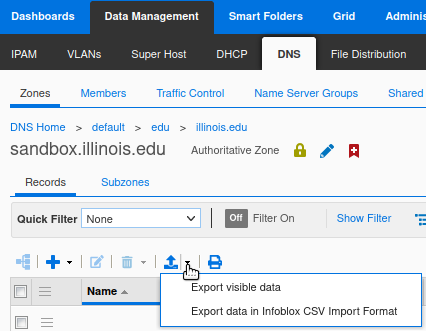
- Choose “Export visible data” to download a CSV containing precisely the columns and values that are actually visible within the current table (i.e. as shown on the screen, except that all pages of the table are included).
- Choose “Export data in Infoblox CSV Import Format” to download a full CSV representation of the Grid Manager objects that appear in the current table, including all of their configuration attributes.
Other tables in Grid Manager provide only a single Export button with no drop-down menu; this is equivalent to “Export visible data” as described above.
![]()
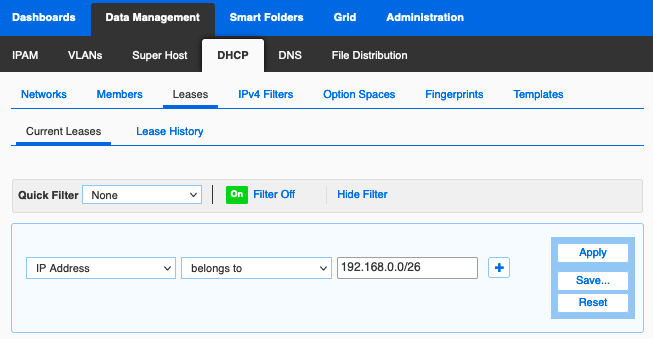
You can restrict which rows (objects) are included in the CSV by applying a Filter to the table beforehand.